Previously published on fastradius.com on February 15, 2022
As manufacturing technology evolves, so too must the manufacturing industry’s design for manufacturing (DFM) skillset. The additive manufacturing landscape in particular has advanced dramatically over the past decade: 3D printing used to be considered a prototyping tool, or even a novelty, but now that the technology has reached industrial-grade capabilities, design for additive manufacturing (DFAM) has become a highly coveted capability amongst engineers and product developers.
Given the rapid pace of change, if you’ve spent years honing your DFM expertise for legacy manufacturing technologies, the prospect of having to learn new DFAM techniques may seem overwhelming. That challenge may be complicated further by different 3D printing technologies: the optimal DFAM techniques for fused deposition modeling (FDM), for example, may be different from stereolithography (SLA), Carbon Digital Light Synthesis™ (DLS), or HP Multi Jet Fusion (HP MJF) – and entail significant new cost, material, and design considerations.
Understanding 3D Printing Technology
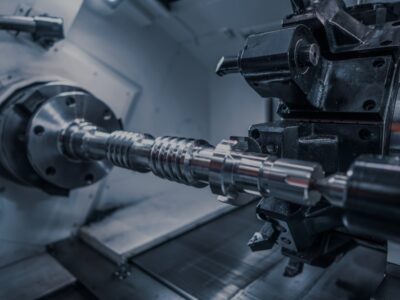
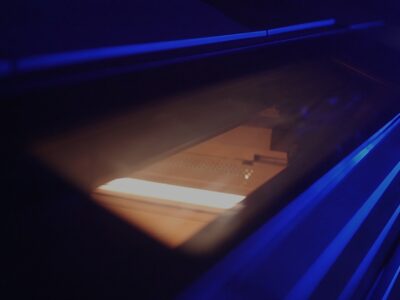
It should go without saying that a design project should be developed with an understanding of the technology that will be used to create it. 3D printing is an additive manufacturing process which means material is added progressively, layer by layer, to form a finished part — as opposed to a subtractive manufacturing process, such as CNC machining, in which material is removed from a workpiece by a cutting tool.
However, despite its differences from traditional manufacturing methods, the integration of additive manufacturing with existing production frameworks doesn’t have to be difficult. With a little creative thinking and a willingness to shift your perception, pivoting designs for additive production won’t be as challenging as you might imagine.
If you’re ready to make the change, here are five 3D printing design tips to help you get started:
1. Prepare for New Challenges
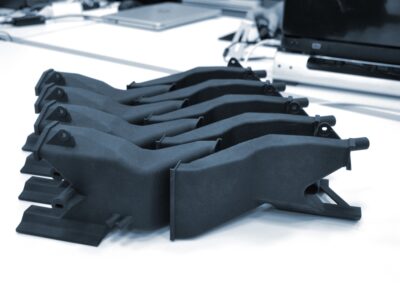
Additive manufacturing has opened up a range of manufacturing possibilities, enabling the creation of previously ‘unmakeable’ parts with relative speed and efficiency. However, DFAM also brings new challenges that designers and engineers must account for as they take parts from their digital state to physical production. The build volume of 3D printers, for example, may restrict the size of certain parts, and require projects to be built using multiple prints. Meanwhile, specific printing technologies have their own challenges: FDM produces parts with visible layer lines which may not be represented in digital designs (and which may be smoothed post-production), and the HP MJF process requires parts to go through a cooling process, and then be cleaned, post-print which may extend production timelines.
DFAM is an undeniably exciting frontier but to get the most out of your 3D printing technology, it’s important to design around these practical considerations as you develop projects.
2. Adjust Supporting Structures
In order to account for elements with overhangs, parts may need supporting structures, which can generate design challenges. The need for supporting structures will depend on the angle at which an overhang is set and it is important to remember that the supports will consume 3D printing materials, adding extra cost and time to the print process.
Fortunately, you may be able to reduce the need to support overhangs – and save time and money – with a few simple strategies. A good rule of thumb is to minimize the angle of overhangs on your part as much as possible: inclines of 45 degrees and beyond generally require supports, while those under 45 degrees do not. Similarly, you may be able to anchor certain parts by making the required support a part of the design, or adjusting the orientation of the part on the build plate. Finally, you may choose a more ‘support friendly’ printing method: powder bed 3D printing processes, like HP MJF, do not require parts to be designed with supports since the powder in which they are made is self-supporting.
3. Reduce Warping
If you’re just beginning your additive manufacturing journey, it’s possible that the available additive materials, and their properties, will be unfamiliar.
In particular, 3D printing processes tend to cause materials to warp (especially on large, flat surfaces). Warping may occur as a result of different temperature variables: in the FDM process, material filament is extruded at a high temperature, then cooled. In SLA and DLS printing, parts go through a post-print baking process. In the HP MJF process, warping occurs as a result of sintering, which takes place in a heated bed of material and involves post-print cooling. Some 3D printing processes are more prone to warping than others: the corners of FDM 3D prints, for example, may warp and rise from the print bed as they go through thermal contraction.
It may be possible to address warping by ensuring that 3D printers are correctly calibrated, or by ensuring that parts have suitable adhesion to the print bed. The warping effect may also be mitigated in design by reducing the number of sharp edges or overhanging elements on a part, or by rounding its corners to distribute the thermal stress more evenly. Similarly, long or thin parts have a higher tendency to warp so thickening those parts during design can reduce the effect. Working with experienced partners, like SyBridge, is a good way to prevent warping (when possible) since we can ensure that all equipment calibration is handled correctly prior to printing.
4. Consider Wall Thickness
3D printing technology is capable of achieving impressive precision and of producing parts with very fine details – including extremely thin parts. However, like injection molded parts, the thinner a 3D printed part, the more likely it is that errors occur during the printing process: features that are too thin risk deforming or detaching from the part before the resin can cool. Similarly, any extremely thin parts may end up exacerbating any subsequent warping as the part cools post-production. Even if a thin part makes it through the print process, it may be damaged by any necessary cleaning, finishing, or post-processing.
With those factors in mind, you should ensure that you design your parts to the minimum wall thickness recommended for the 3D printing technology that you are using. SyBridge engineers will work with you to determine a suitable wall thickness for your part – and to manage any unique challenges associated with your design.
5. Explore Creative Opportunities
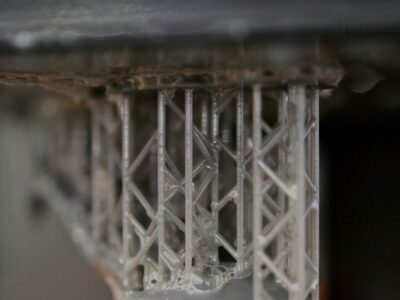
3D printing technology brings opportunities to streamline and optimize the production process in ways that would not be possible with other manufacturing methods. Those opportunities include lightweighting parts without compromising their strength by removing material. One of the most effective lightweighting methods for 3D printed parts is to design with lattices: crosshatch structures that can be tessellated along any axis, that use up less 3D printing material, and that reduce a part’s overall weight.
Think creatively about DFAM optimization opportunities. The lattice, for example, is found in numerous naturally-occurring structures, including in beehives and coral – indeed the natural world represents a vast resource for further DFAM optimization ideas, offering a spectrum of potentially-useful design inspirations. Beyond their weight, parts may be optimized for properties including toughness, elongation to failure, and heat transfer – metrics which have corollaries in the structural properties of human bone, for example, and which may be emulated (to varying extents) by 3D printing technology.
The Value of DFAM Expertise
Advances in technology are changing the additive manufacturing landscape but they haven’t eliminated the importance of human engineering input. When making the transition to DFAM even the best engineers can benefit from third-party experience and expertise — or simply from having an external sounding board — as they design for 3D printing technology.
In short, while there are plenty of available DFAM resources to explore, in-person problem solving remains indispensable. So whether you need help optimizing existing designs, or starting a design from scratch, the engineering team at SyBridge is ready to help you: reach out today to get started.